

Assign a resource on the Gantt chart
This guide shows how to assign an employee to a project on the timeline in Planning.
Prerequisites
Section titled “Prerequisites”- You need a project to assign resources to.
- You need to be a project manager or admin to edit the plan.
1. Create the project (if it doesn’t exist yet)
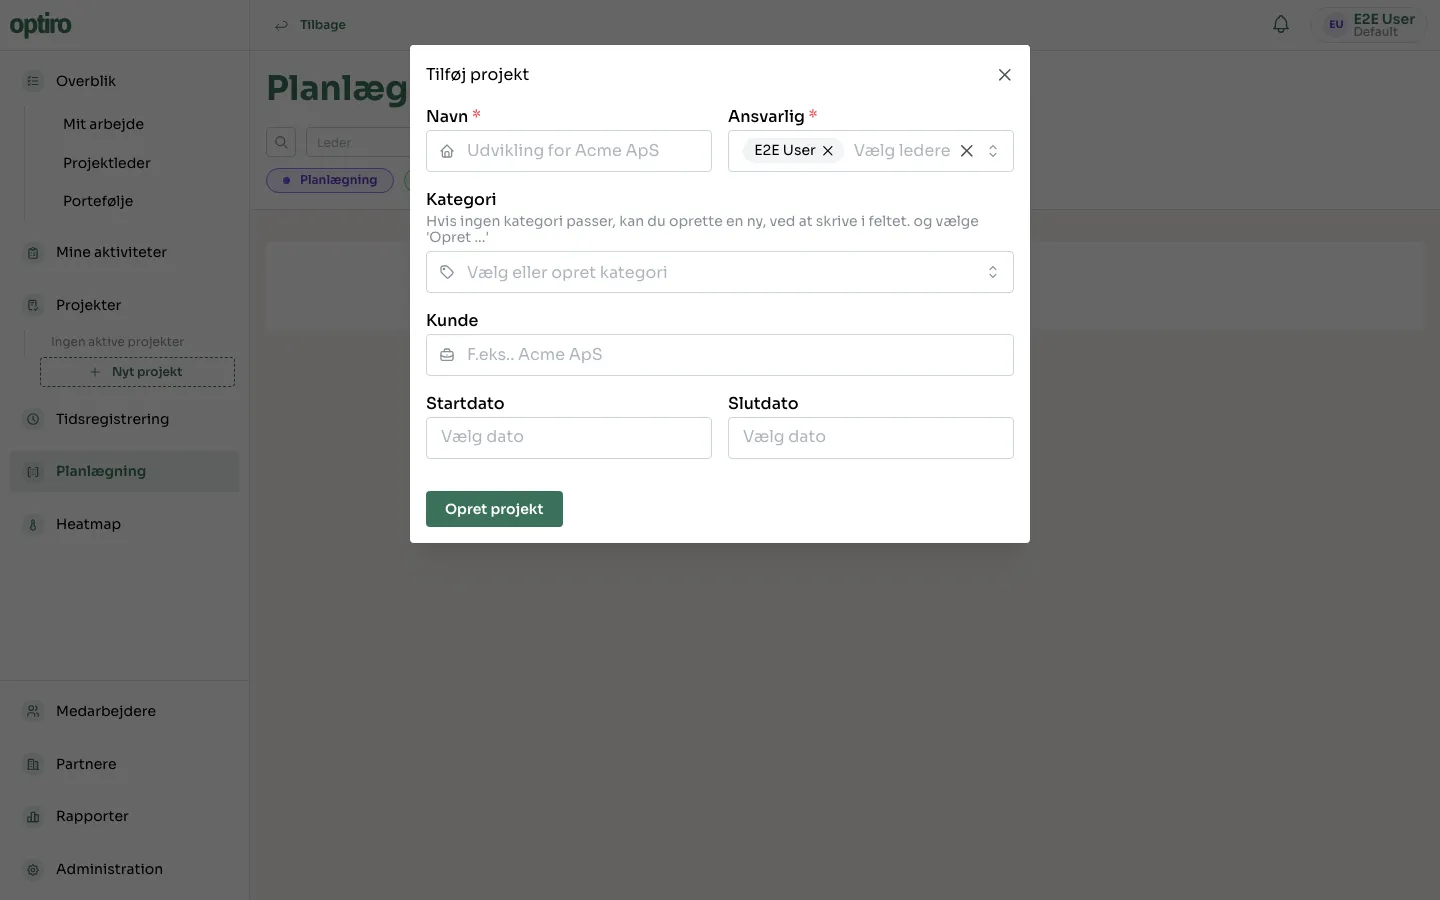
Section titled “1. Create the project (if it doesn’t exist yet)”Go to Planlægning (Planning) in the menu and click Nyt projekt (New project). Fill in a name and an owner.
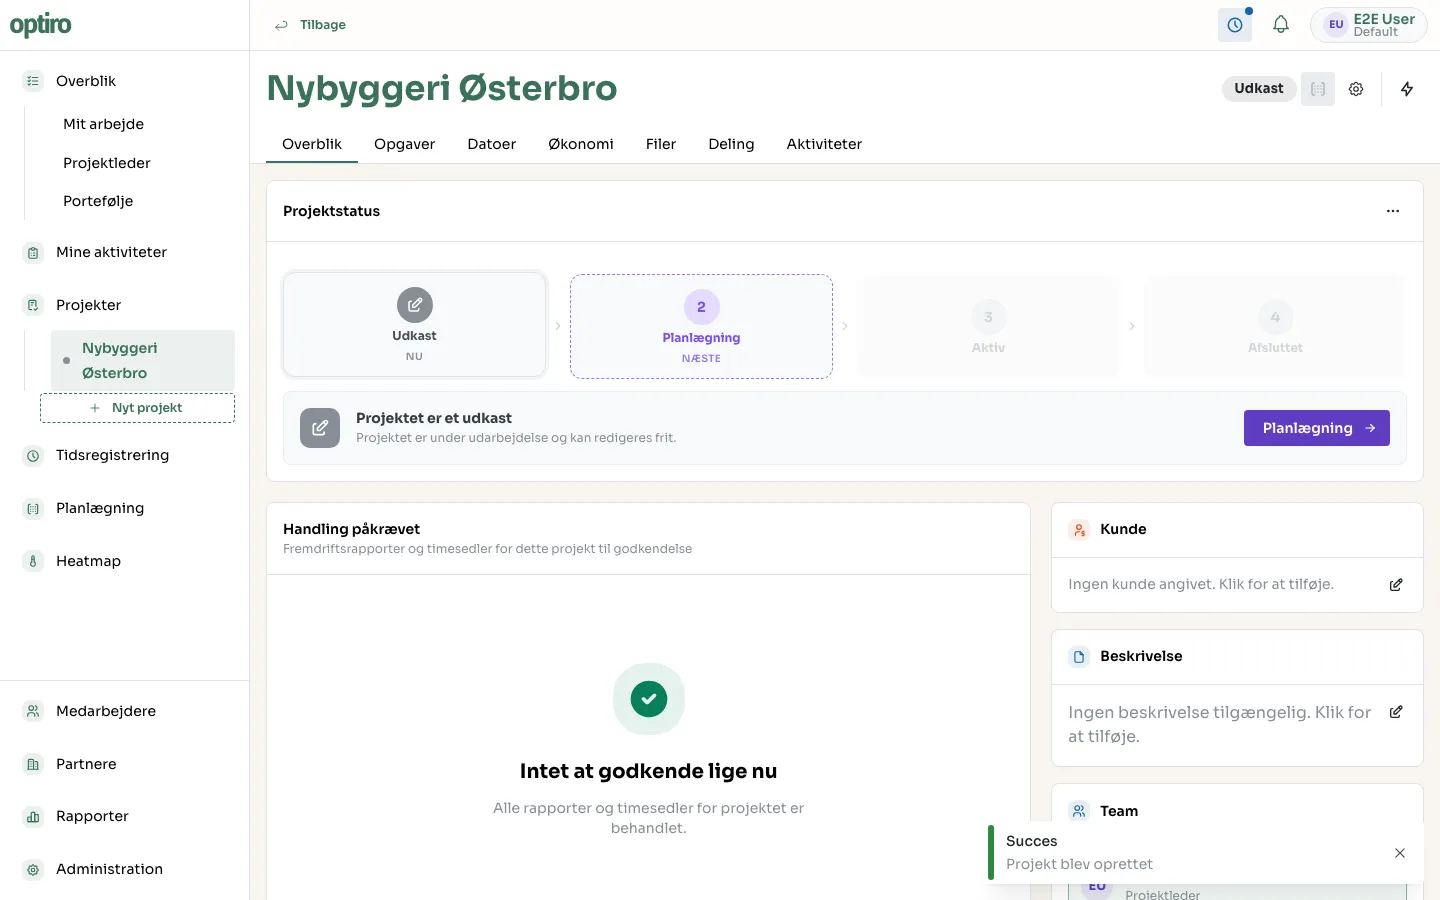
The project is created in Udkast (Draft) status.
2. Start planning
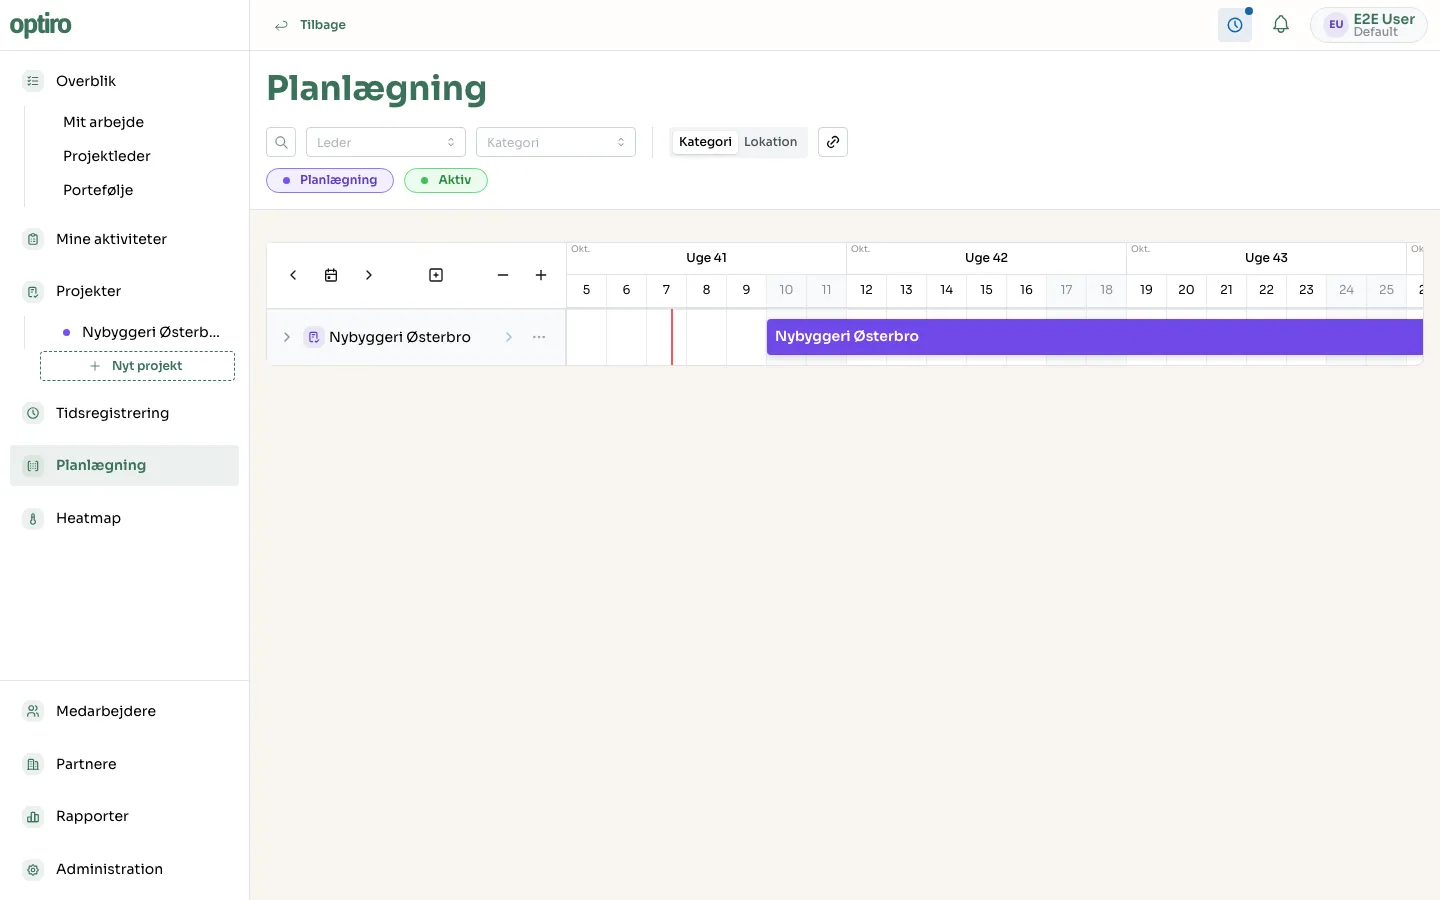
Section titled “2. Start planning”On the project page, click the Planlægning button and set a start and end date for the project. This moves the project from Udkast to Planlægning, and it shows up on the Gantt chart.
3. Add resources
Section titled “3. Add resources”Click the … menu next to the project on the left, and choose Tilføj ressourcer (Add resources).
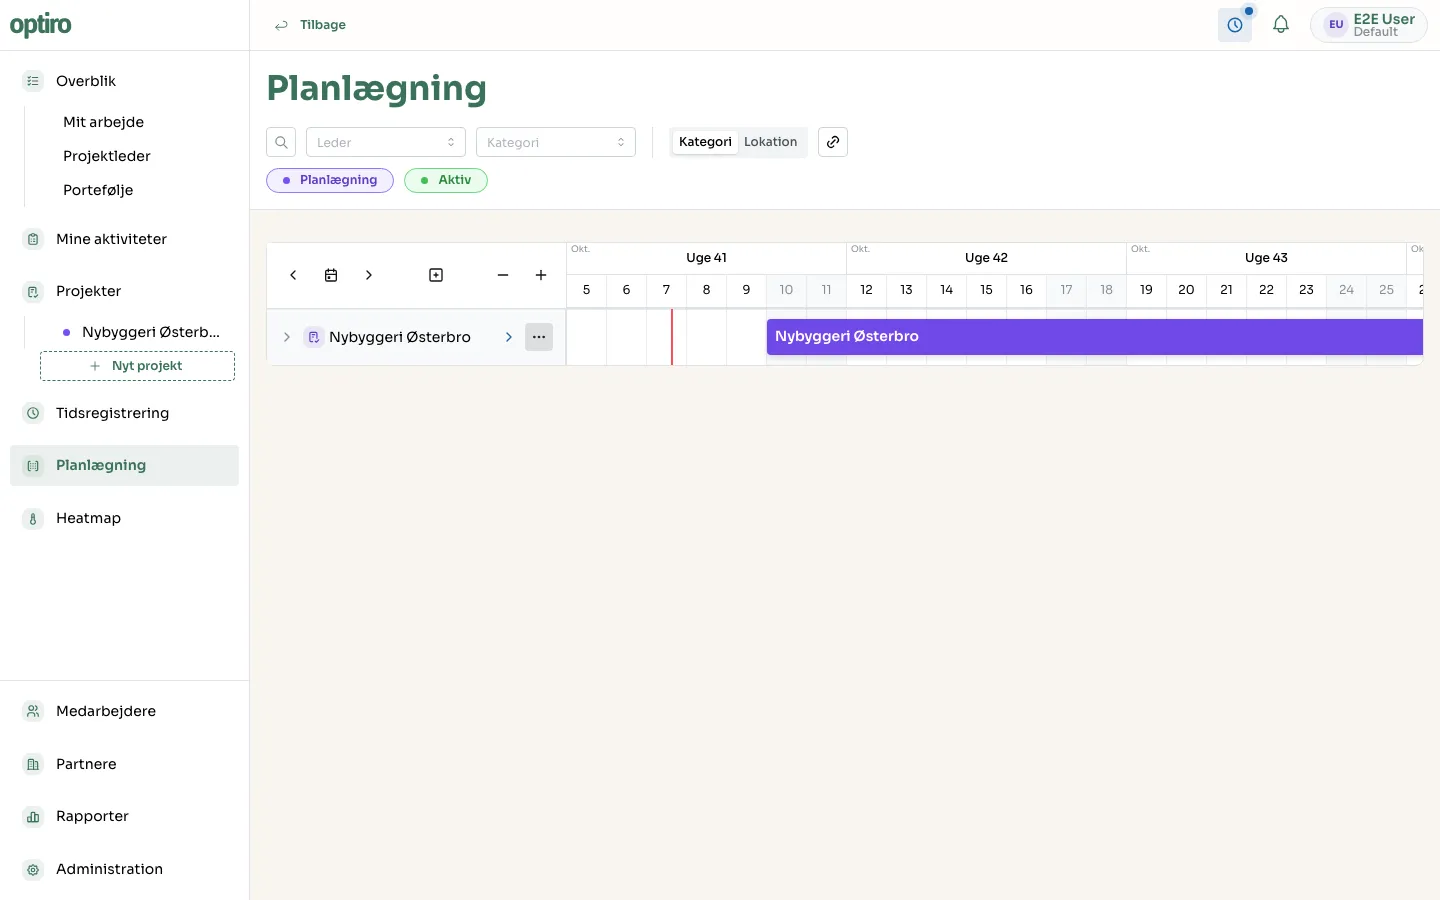
Pick the employee(s), partner(s), or placeholder(s) you want to assign. You can also pick a specific task to assign them to — otherwise they’re assigned to the project in general, and you can change that later.
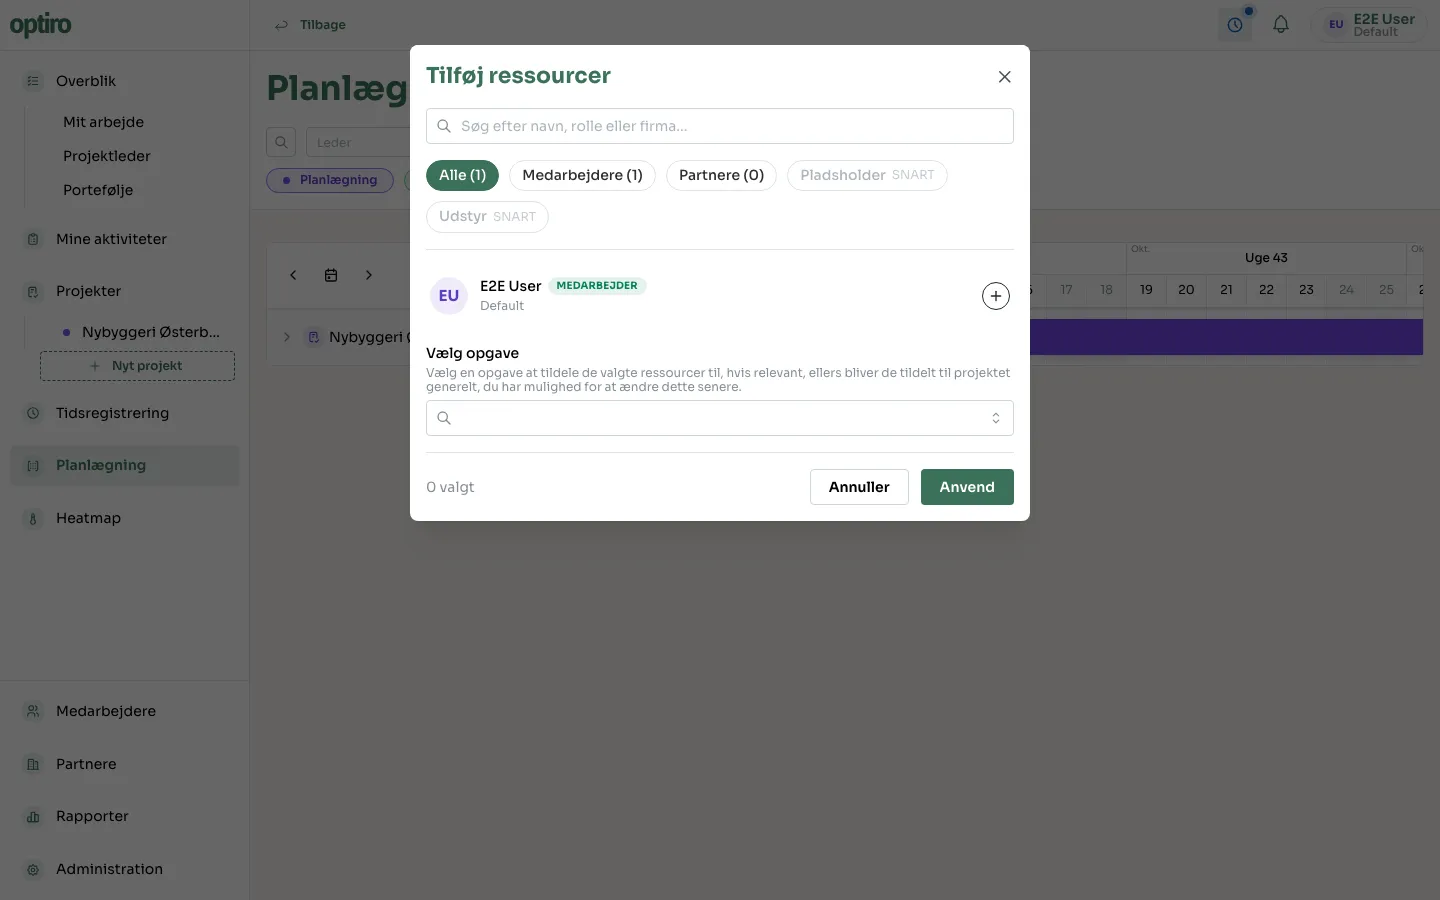
Click Anvend (Apply).
4. See the assigned resource
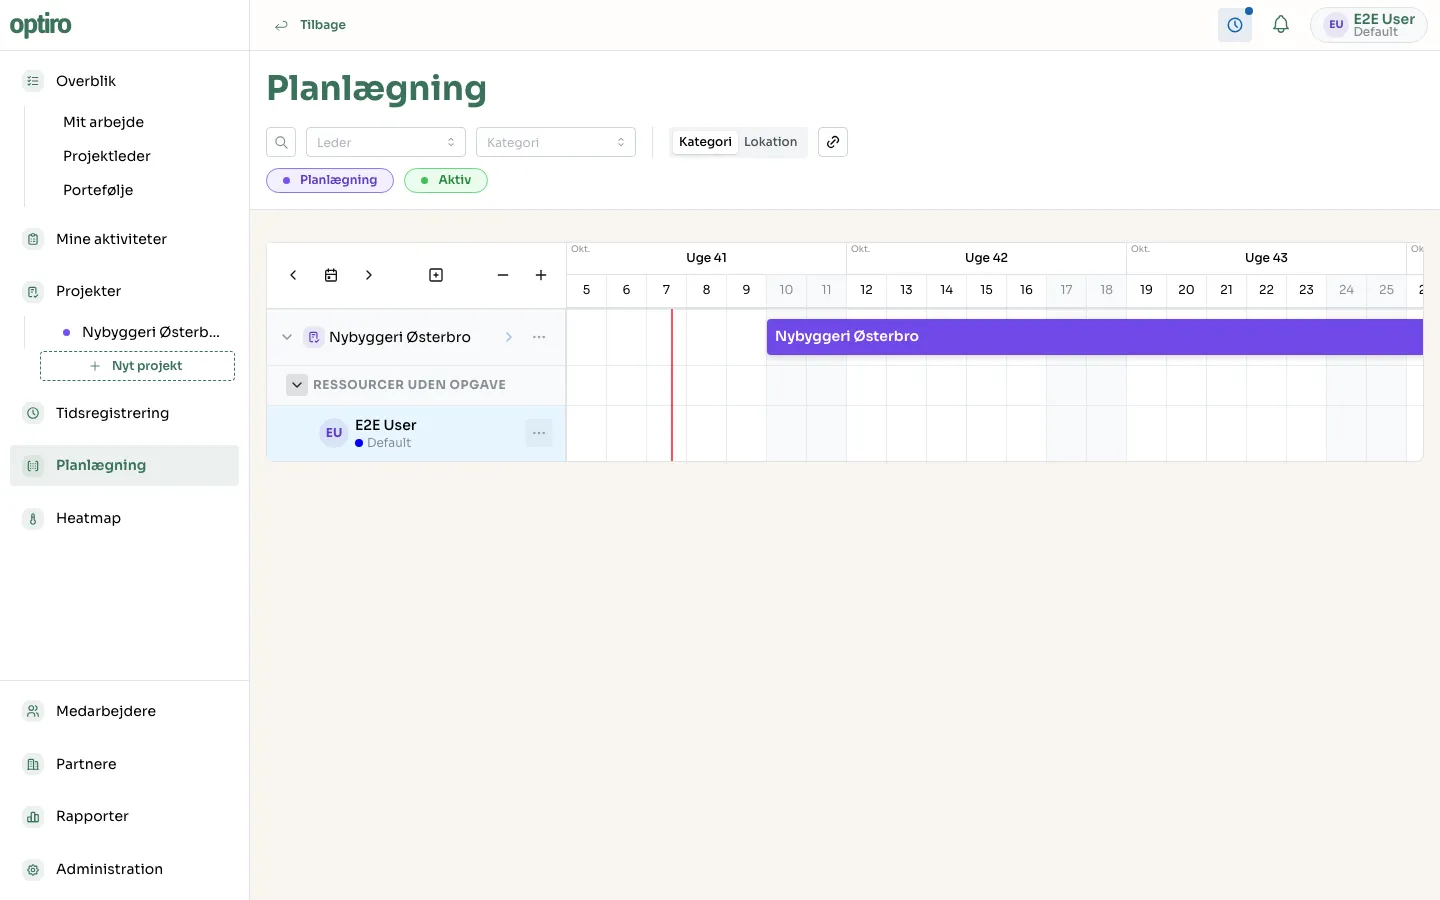
Section titled “4. See the assigned resource”Click the arrow to the left of the project name to expand the row. The resource now shows up under the project.
Next steps
Section titled “Next steps”- Tasks — create tasks and assign resources directly to them.
- Accounts & Partners — view and manage employee availability.